Struggling to price arches & garlands? This NEW simple calculator does the math for you.
- Home
- Balloon Centerpieces
- Hot Air Balloon Centerpiece
How to Make a Hot Air Balloon Centerpiece
A hot air balloon centerpiece is a beautiful decoration idea for any kind of party that symbolizes the beginning of a new chapter, like a baby shower, wedding, graduation, moving house, or even a "round" birthday.
It can also be a spectacular "wrapping" for a hot air balloon ride gift voucher.
If you make a purchase through a link on my site, I may receive a small commission at no extra cost to you. I only recommend products that I believe to have good value (affiliate disclosure).
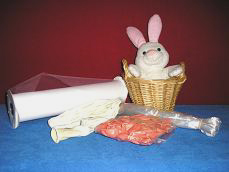
Let me show you how to make your very own hot air balloon centerpiece with this step-by-step tutorial. It's really quite simple and you'll be surprised by the impressive result.
DIY Hot Air Balloon Centerpiece - What You Need:
- a 36" high quality latex balloon,
- a large balloon net,
- a few 5" latex balloons,
- small wicker basket (best with two handles, as shown in our example),
- cuddly toy,
- tulle and
- helium.
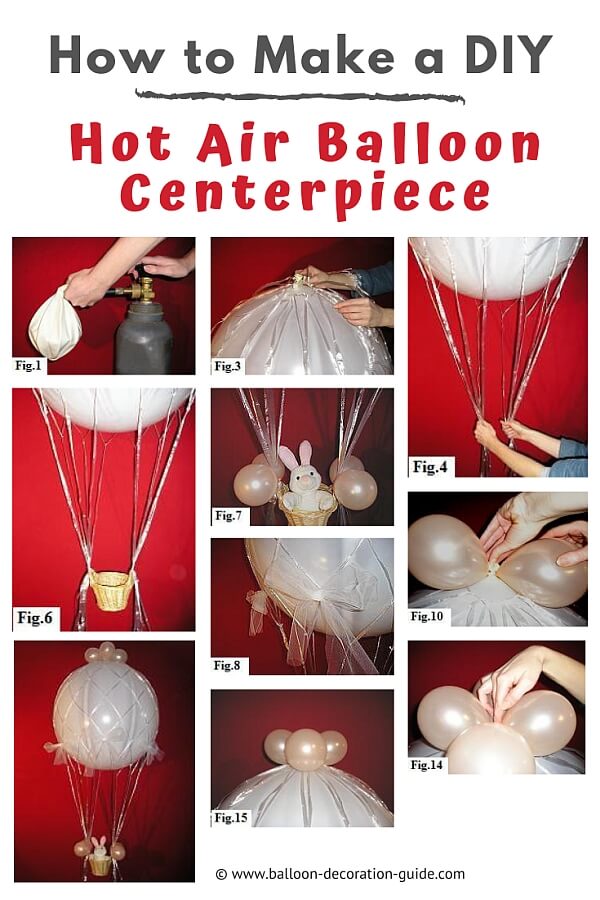
Step 1: Inflate the 36 inch balloon with helium
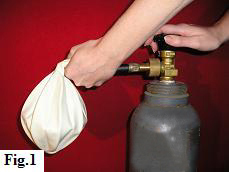
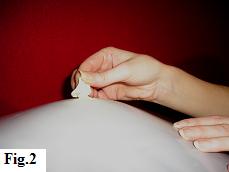
Start by inflating the large balloon with helium. Keep a firm grip round the neck while you are inflating it (fig. 1). Once the balloon is fully blown up, tie a knot (fig. 2).
Step 2: Drape the netting over the balloon
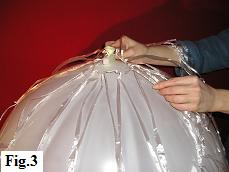
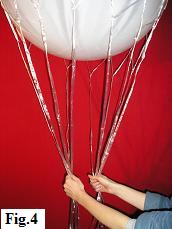
It may be easier if you have an assistant help you with the following steps. With the neck of the balloon pointing upward, drape the balloon net over it (fig. 3). Then divide the strings of the net into two halfs (fig. 4).
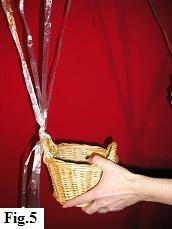
Now tie the first bunch of strings to the basket handle (fig. 5). The length from the bottom of the balloon to the handle should be roughly 55 cm (22").
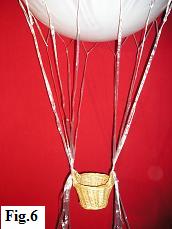
Tie off the second bunch of strings to the other side and check that the basket is sitting level (fig. 6). Finally tie a second securing knot to both sides.
Step 3: Add finishing touches to your hot air balloon centerpiece
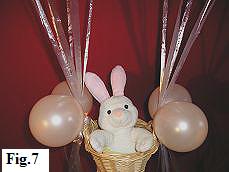
Take four 5" balloons, inflate them with air and tie them off into groups of two.
Attach both duplets to the basket, either by tying them on with ribbon or by simply bringing them round the net strings and twisting them once around on themselves (fig. 7).
Another delicate finishing touch is to tie some tulle bows at intervals around the balloon net (fig. 8).
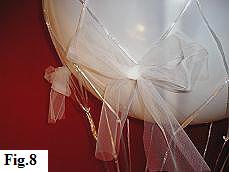
The final part is to dress up the knot on the top of the balloon. So, blow up another four 5" balloons and once again, tie them into groups of two.
Take the first duplet and while pulling up slightly on the big balloon knot, bring them around (fig. 10) and twist them once (fig. 11).
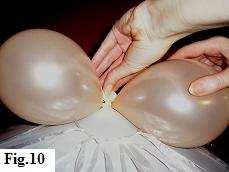
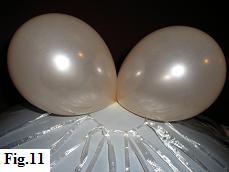
Now take the second pair of balloons (fig. 12) and push them centrally between the first set of balloons (fig. 13).
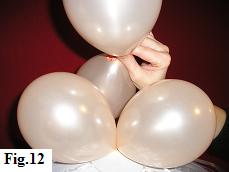
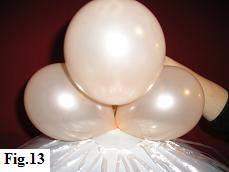
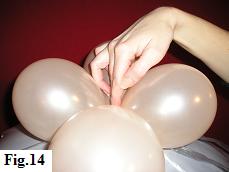
Be sure to push them all the way down (fig. 14) and you will find that the tension of all four balloons keeps the cluster firmly in place (fig. 15).
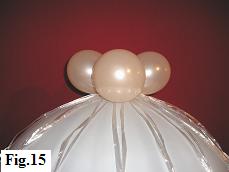
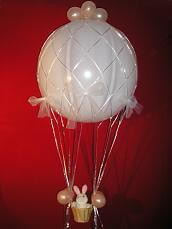 That's your hot air balloon centerpiece finished!
To display this beautiful decoration, you can either weight the basket down to make it floor or table standing, or - for its best effect -, tie it off using nylon line so that it floats in mid air.


![Balloon Drop at a Party [Image Source: Eventbrite.com]](/image-thumbnails/how-can-i-make-a-balloon-drop-for-a-wedding-and-is-there-a-way-of-releasing-them-21850402.jpg/default.webp)
![Balloon Heart Frame [Image source: Aliexpress.com]](/image-thumbnails/where-can-i-buy-balloon-heart-frames-21973261.jpg/default.webp)
Have your say about what you just read!
Leave me a comment in the box below. Don't see the comments box? Log into your Facebook account, give Facebook consent, then return to this page and refresh it.