How many balloons for an arch? Want a simple answer? Get my free calculator now!
- Home
- Balloony FAQ
- Blowing Up Balloons
Blowing Up Balloons Like a Pro
- Four Ways Explained Step-by-Step -
Ever tried (and failed) blowing up balloons with your mouth? You huff and puff, your face turns bright red, but the balloon's still limp and empty.
Inflating balloons can be a challenge, whether you do it with your mouth, a balloon pump, electric inflator or a helium tank. The tips below will help you blow up balloons like a pro!
Jump to the section that interests you most:
- Blowing Up Balloons with Your Mouth
- How to Blow Up Balloons with a Hand Pump
- Using an Electric Balloon Inflator
- Inflating Balloons with Helium
If you make a purchase through a link on my site, I may receive a small commission at no extra cost to you. I only recommend products that I believe to have good value (affiliate disclosure).
1. Blowing Up Balloons with your Mouth
 Challenging, but doable!
Blowing up balloons with your mouth will take a bit of practice, but you'll get there. Promise!
Start with round 9" or 11" latex balloons. Some people prefer jewel-toned because the latex feels a bit thinner and that sometimes makes it easier to inflate.
Step 1:
Stretch the balloon with your hands in all directions before beginning to blow. This "warms up" the latex and makes it easier to fill with air.
Be careful not to stretch it too much. You don't want any tears in the latex or risk that the balloon will pop when fully inflated.
Step 2:
Put the entire opening of the balloon between your lips and hold it near your lips with one hand and hold the bottom of the balloon straight out with the other. This stretches the balloon neck so the air can flow evenly into the hole.
Step 3:
Next, begin to blow. There will be a bit of resistance before the inflation begins. Do not blow with all your might. It just gives you a headache and puffy cheeks.
Yes, your cheeks need to fill with some air, but the air should go into your balloon. The trick is to start the flow of air and then keep blowing.
Once the inflation begins, you will need to pause every few breathes to inhale. When you do this, clip off the neck or opening of the balloon with your fingers on the hand near your mouth.
This prevents the air from flowing back out. Inflate the balloon until it feels taught, but make sure the neck is still pliable. This will keep the balloon from exploding and it will enable you to tie off the end.
Step 4:
Now that the balloon is inflated, tie a knot in the tail. You have done it! A perfectly blown up balloon. :-)
Special Tip: This balloon tying tool got raving reviews at Amazon. You may want to give it a try, especially if you have lots of balloons to tie.
2. How to Blow Up Balloons with a Hand Pump
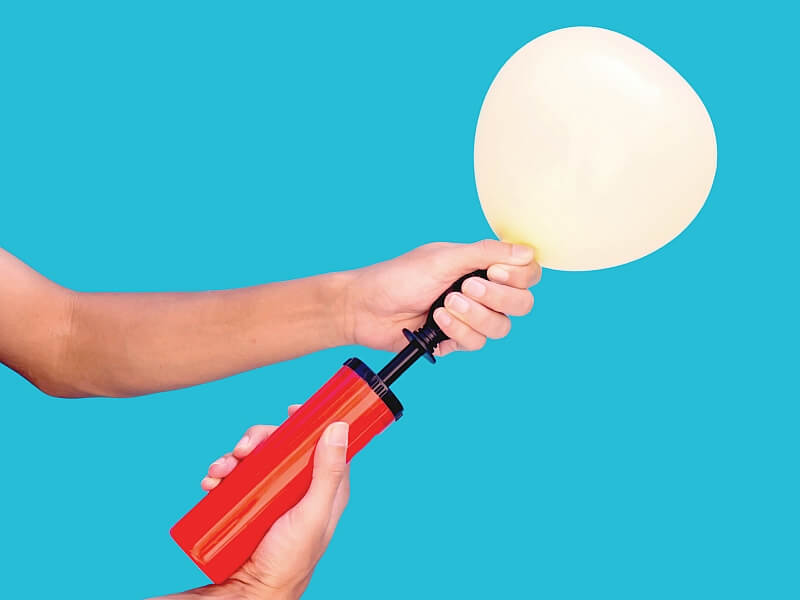 Manual balloon pumps make it much easier to blow up balloons than using your mouth.
Hand pumps are great if you want to save your breath, but aren't ready yet to invest in an electrical air inflator. You'll find a large selection of hand-held balloon pumps on Amazon.
Special Tip: The so-called 2 way or "dual action" pumps are a good choice as they pump air when pumping in both directions, inflating your balloon faster than a one way pump.
Step 1:
Slide the balloon neck over the nozzle of the balloon pump.
Step 2:
Start pumping. Pull out the hand lever and press it back in while holding the balloon in place with your other hand. If you are using a dual action pump, air will flow into the balloon when pulling and pushing the lever.
Step 3:
When fully inflated, pinch the balloon neck closed, remove the balloon from the nozzle and tie a knot.
3. Using an Electric Balloon Inflator
When you need to inflate a lot of balloons, for example for an air-filled balloon column, you may consider investing in an electric balloon inflator.
For personal use, you can get good quality balloon blowers rather inexpensively at Amazon. Check out the two options below. Both have a high amount of 4.5 to 5 star ratings.
Step 1:
Plug your electric inflator into a socket and turn it on.
Step 2:
Pinch the balloon neck open with two fingers and slide it over one of the nozzles. Both machines shown above have an automatic port and a manual or semi-automatic port.
When you place a balloon on the automatic port, it immediately starts inflating. I suggest you use the manual port first, as it allows you to blow up the balloon at your own pace. Once you have some practice, you can use the automatic port, or even both ports at the same time.
Step 3:
Hold the balloon neck in place and push down the manual port to start the inflation.
Step 4:
Keep pressing down the inflation port until the balloon has the desired size (a balloon sizer comes in handy here!). Release the port to stop, remove the balloon and tie its neck.
4. Inflating Balloons with Helium
Depending on the type of helium tank and nozzle you are using, the inflation techniques will vary slightly. My instructions below are for a rented tank with a so-called "quick fill station" valve/nozzle.
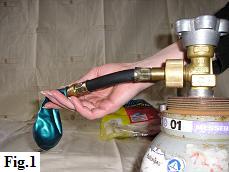
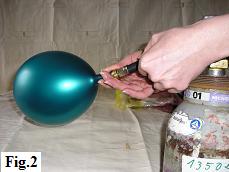
Step 1:
Attach your nozzle to the helium tank. No tools required to screw the nozzle on. Just use your hands.
Step 2:
Open the regulator. It usually tells you which direction to twist. Opening is a twist to the left, i.e. counter clock-wise. You'll hear an initial pop when the valve is open.
Step 3:
Slide the neck of the balloon over the nozzle, about half way down, keeping a firm grip with your thumb and index finger. Now gently push down the valve to start the helium flowing.
If you are doing this for the first time, press down very gently so that you get a slow, controlled release of the gas into the balloon
Step 4:
When the balloon is fully inflated, slip it off the valve and tie a knot. Remember that your balloon will float, so either put it somewhere where it can't escape or tie a ribbon round the balloon neck.
Step 5:
Close the regulator by turning it to the right, i.e. clock-wise.
To see those instructions live, watch the short video below.

Blowing up balloons doesn't have to be complicated, if you know how to do it. For easy reference, pin this page or share it with your friends.
Watch hilarious Balloon Popping Videos
Check out our Balloon Pumps Review



Have your say about what you just read!
Leave me a comment in the box below. Don't see the comments box? Log into your Facebook account, give Facebook consent, then return to this page and refresh it.