Struggling to price arches & garlands? This NEW simple calculator does the math for you.
- Home
- Balloon Gifts
- Balloon Box
Balloon Box Tutorial:
How to Make a Balloon Gift Box
A balloon box is a super gift idea for many occasions, from birthdays to Mother's Day, Father's Day and - of course - Valentine's Day. I've even seen it at gender reveal parties or underneath the Christmas tree.
Extra bonus: you can either deliver it in person or have it sent via a mail service.
With our step-by-step tutorial, you'll know how to make a balloon gift box yourself in no time at all!
If you make a purchase through a link on my site, I may receive a small commission at no extra cost to you. I only recommend products that I believe to have good value (affiliate disclosure).
What You Need for a Balloon in a Box
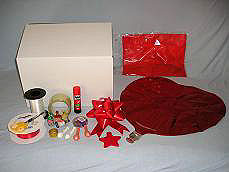
- a white cardboard box, approx. 40 x 40 x 25 cm,
- an 18" foil balloon; in our example we used a red mylar heart balloon,
- helium (e.g. a small disposable canister for filling one 18" mylar balloon),
- four sheets of red tissue paper, approx. 50 x 70 cm,
- red deco ribbon, ca. 30 to 40 mm wide (1" to 1.5"),
- curling white ribbon, 5 mm wide,
- one large self-adhesive decorative red bow,
- a balloon weight,
- four to six 5" latex balloons,
- four to six party poppers,
- decorative metallic confetti,
- a glue stick (e.g. 'Uhu', 'Pritt Stick') and
- clear packing tape, 5 cm wide.
Step 1: Lining the Balloon Box
Take four pieces of tissue paper and cut them to the width of your box. The length you require will be the height plus the width, which gives you enough to line each side and four overlapping layers to cover the bottom of the box.
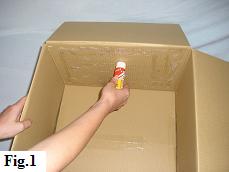
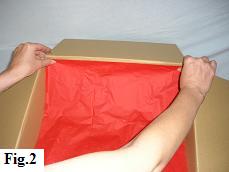
Starting on one side, run your glue stick around the edges and three or four times across the middle (fig. 1). Now take the first sheet of tissue paper and carefully line it up with the top edge of the box (fig. 2).
Before pressing it into position, make sure that the remainder of the tissue paper will not come into contact with the glue on the surface.
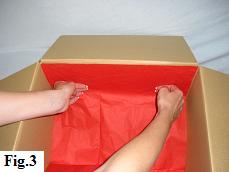
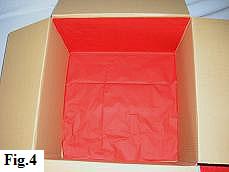
Now, working from the top down to the bottom, begin lightly and evenly pressing the tissue paper onto the side (fig. 3). The remaining length of the tissue paper should be covering the bottom of the box completely (fig. 4).
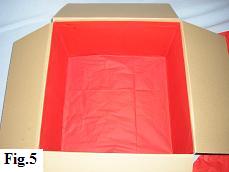
Repeat these steps on the remaining three sides and the box should finish up neatly lined and with four overlapping layers of tissue paper to 'soften' the bottom of the box (fig. 5).
Step Two: Applying the Decorative Ribbon
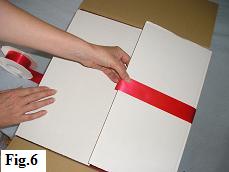
Take the deco ribbon and bring it around the underside of the box. Making sure it's centralised, line up the end of the ribbon with the edge of the first closure flap and attach it with a piece of clear packing tape (fig. 6).
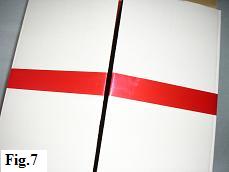
Now bring the other end of the ribbon around and cut it so that it lines up with the edge of the second flap. Again, attach it with a piece of clear packing tape (fig. 7).
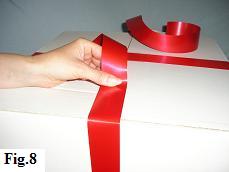
Take your second length of deco ribbon, giving enough to wrap around the box and overlap at each end by about 10 cm (fig. 8).
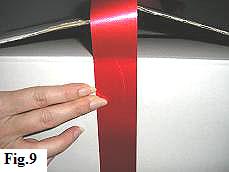
Now, making sure that the ribbon runs centrally across the seam of the two flaps, take a piece of clear packing tape to stick the ribbon at the top edge of the side of the box (fig. 9). Repeat this on the opposite side of the box.
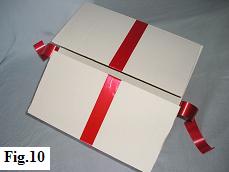
And this is how your box should look!
Step 3: Filling the Balloon Box
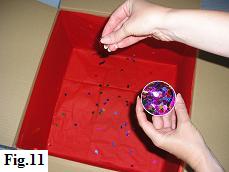
Sprinkle some decorative metallic confetti into the box. We used multi-colored balloon and star shaped confetti (fig. 11).
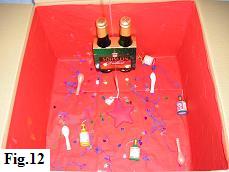
Add your 5" latex balloons and the party poppers. If you like, you can always add some extra little gifts and, of course, a greeting card. For example, in our gift box we chose two small bottles of sparkling wine (fig. 12).
Now you need to attach your curling ribbon to the mylar heart and inflate it with helium as shown on our 'Valentine Balloon Bouquet' page.
If you don't want to stretch to the cost of a large helium tank, you have two options. Either get an already inflated mylar balloon from your local Walmart or party store or purchase a disposable helium tank.
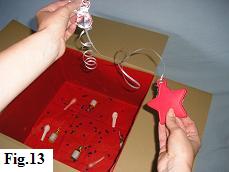
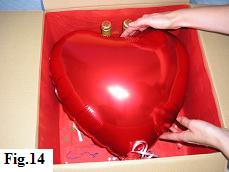
Next, tie the balloon weight to the other end of the ribbon (fig. 13) and place the balloon heart in the box (fig. 14).
How to Make a Balloon Gift Box: Finishing Touches
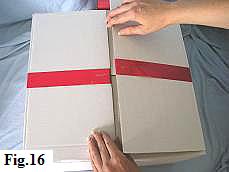
Fold in the first two ribbon-less flaps (fig. 15), followed by the remaining two with pre-attached ribbons (fig. 16).

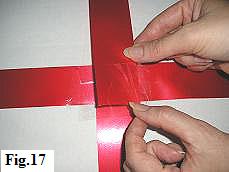
Now take the two loose ribbons and bring them across the top of the box to meet one another and join them together using a piece of clear packing tape (fig. 17).
Next, add the finishing touch by attaching the self-adhesive decorative bow to the center of the box (fig. 18).
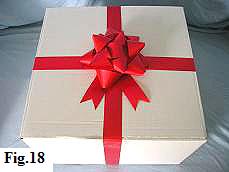
And there is your fun surprise balloon box, all set for delivery to the lucky recipient!



![Balloon Drop at a Party [Image Source: Eventbrite.com]](/image-thumbnails/how-can-i-make-a-balloon-drop-for-a-wedding-and-is-there-a-way-of-releasing-them-21850402.jpg/default.webp)
![Balloon Heart Frame [Image source: Aliexpress.com]](/image-thumbnails/where-can-i-buy-balloon-heart-frames-21973261.jpg/default.webp)
Have your say about what you just read!
Leave me a comment in the box below. Don't see the comments box? Log into your Facebook account, give Facebook consent, then return to this page and refresh it.