Struggling to price arches & garlands? This NEW simple calculator does the math for you.
- Home
- Balloon Arches
- Balloon Decorating Strip Tutorial
Balloon Decorating Strip Tutorial
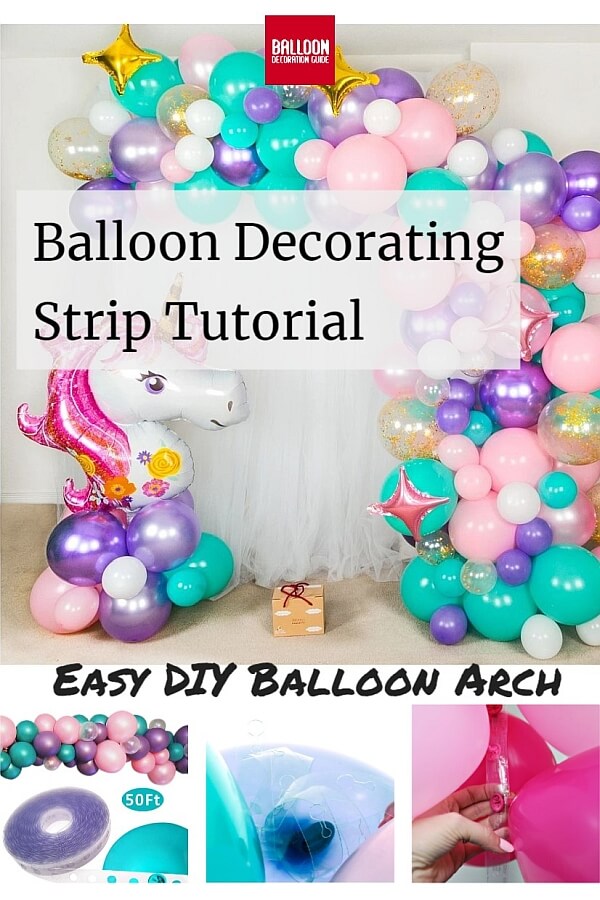
Creating a gorgeous looking balloon arch or garland has never been easier. Don't believe me? Meet the balloon decorating strip!
This clever invention is freaking easy to use. Let me show you how in this balloon decorating strip tutorial. But first...
If you make a purchase through a link on my site, I may receive a small commission at no extra cost to you. I only recommend products that I believe to have good value (affiliate disclosure).
What is a balloon decorating strip?
A balloon decorating strip, also called balloon arch tape or balloon garland strip, is a clear plastic strip, about 0.4" to 0.6" wide (1 cm to 1.5 cm), with evenly spaced out holes.
These holes hold your latex balloons in place, allowing you to create a beautiful balloon arch or garland without using helium, a frame or even having to tie balloon clusters.
Pretty cool, right?
My research revealed three different types of balloon decorating strips:
Balloon decorating strip with single, one-size holes
An example would be this 50 ft long strip from a brand called Heboland. The product description says that you'd need 1,200 balloons for a 50 ft arch, i.e. 24 balloons per foot.
Strip with larger and smaller single holes
The second type comes from the brand Ladybug. It's 25 ft long and has smaller and larger holes. The smaller holes are for 3″ to 9″ balloons, the larger ones for 9″ to 18″ balloons.
According to the seller, the strip holds 12 balloons per foot. For a 25 ft garland, you'd need 300 balloons.
Strip with double or key-shaped holes
The third type has key shaped holes, i.e. a larger and smaller hole side by side, connected with each other. You pull the balloon knot through the larger hole, then slide it over to the smaller hole to lock it in place.
The package sold by a brand called Kinggrid contains 2 x 16.5 ft long decorating strips, for a total length of 33 ft. Each 16.5 ft long strip has 110 holes and can hold as many balloons, i.e. 7 balloons per foot.
Which type of balloon tape should you use? All three products receive high ratings at Amazon, with an average of 4.7 out of 5 stars. I personally would go with the double-hole type. The larger hole makes it easier to pull the balloon knot through, and the smaller hole secures it firmly.
How do you use the balloon decorating strip?
Step 1:
Cut the strip to the desired length of your balloon arch or garland. If you are doing a garland, simply measure the space where you want to hang it. Allow for some curves rather than measuring just a straight line.
If you are planning to do an arch, here's a handy balloon arch calculator to determine the total arch length.
Pro Tip: Leave about 12" (30 cm) of balloon arch strip empty at both ends. This will make it easier to attach your garland to the wall.
Step 2:
Blow up your latex balloons with air. If it's a smaller design, you should be good by using a manual balloon pump. However, if you go for a 25 feet (or larger) garland, you should consider getting an electric pump. You've got loads of balloons to inflate!
What size of balloons should you use? This depends on the look you are going for. In its simplest form, just use 11" balloons and blow them up to different sizes.
To achieve the trendy organic balloon arch look, use balloons in different sizes, ranging from 5" to 36" balloons.
Now let's move on to the fun part of this balloon decorating strip tutorial!
Pro Tip: While you can insert 5" balloons into the holes, they will "disappear" among the bigger balloons. It's best to keep the 5" balloons apart, and add them at the end with the help of glue dots or a cool melt glue gun (see step 5).
Step 3:
Take your first inflated balloon, pinch its lip together and pull the knot through the first hole (remember to leave about 12" of the strip empty). The holes are large enough to let you pull the knot through, but small enough to keep the balloon in place.
If you are using the double-hole strip type, pull the neck through the larger hole, then slide it into the smaller hole to lock it firmly in place.
Take the next balloon, and pull it through the next hole. Alternate between different sizes of balloons to get the staggered effect. Also alternate between the sides of the strip to make the garland or arch look fuller.
Sometimes you may need to skip a hole, especially when you are placing your larger balloons.
Step 4:
Time to put your piece of balloon art into place! The best way to suspend the balloon garland from the wall or ceiling is to use any kind of structure or fixture that's already in place.
The second best way is to use removable command hooks (but be aware that these might do some damage to the wall, even though they are supposed not to).
Loop a piece of fishing line through one of the holes in the decorating strip, tie it off and attach the other end to the hook.
Alternatively, tape the empty length of the decorating strip directly to the wall, using masking or painter's tape.
If you are working with a wooden surface, you could also staple the strip ends to the wood.
Step 5:
Take a step back and admire your creation! You've still got those 5" balloons handy, right? Use them to fill in any gaps or empty spaces between the larger balloons.
To do this, glue the small balloons to the larger ones. Glue dots are the easiest method, but you can also use a cool melt glue gun.
Three of these five best balloon arch kits use a balloon decorating strip. Why not try your newly acquired skill and create one of them? My personal favorite is the "Retro Arch / Garland." The colors are simply AMAZING!
Step 6 (optional):
Want to beautify your balloon arch or garland even more? Add some light greenery, leaves or flowers, by simply poking the stems (carefully) between the tightly packed balloons.
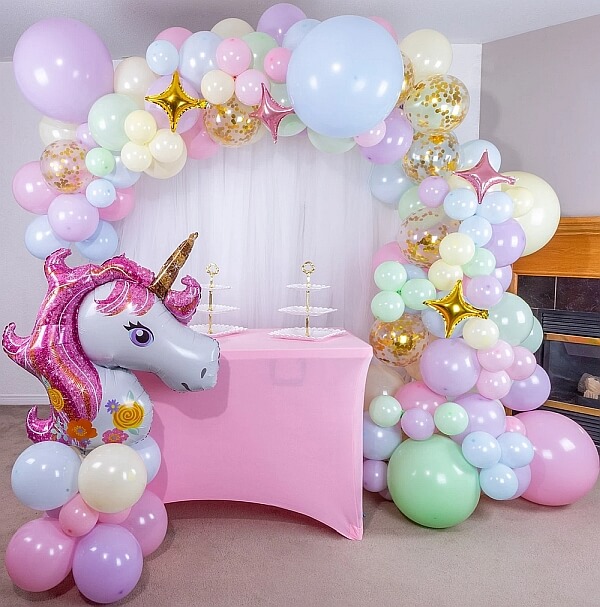
And if the garland is for a specific occasion, a themed mylar balloon makes it crystal clear that this is a unicorn party, a birthday celebration, or a baby shower!
Balloon Decorating Strip Tutorial Video
The folks at Shimmer and Confetti have created this excellent tutorial video. It shows step by step how to make a unicorn themed, pastel colored balloon garland with the decorating strip.

Can't wait to make this gorgeous balloon decor yourself? You are in luck! Rather than having to buy all the materials separately, you can get the complete kit from Shimmer and Confetti.
At the time of this writing (March 2025), the complete kit sells for $33.95. It includes:
- 125 pastel blue, pink, purple, yellow and green balloons
- 10 gold confetti balloons
- 2 gold curling ribbons
- 2 balloon tying tools
- 180 ft of fishing line
- Balloon decorating tape
- Balloon garland glue
- 2 balloon flower clips
- Detailed instructions
- Not included: Unicorn and star shaped foil balloons
I don't know about you, but to me that's an incredibly good deal.


![Balloon Drop at a Party [Image Source: Eventbrite.com]](/image-thumbnails/how-can-i-make-a-balloon-drop-for-a-wedding-and-is-there-a-way-of-releasing-them-21850402.jpg/default.webp)
![Balloon Heart Frame [Image source: Aliexpress.com]](/image-thumbnails/where-can-i-buy-balloon-heart-frames-21973261.jpg/default.webp)
Have your say about what you just read!
Leave me a comment in the box below. Don't see the comments box? Log into your Facebook account, give Facebook consent, then return to this page and refresh it.