How many balloons for an arch? Want a simple answer? Get my free calculator now!
- Home
- Balloon Columns
How to Make a Balloon Column in Four Easy Steps
A balloon column (also called a balloon tower or pillar) is a truly impressive party decoration.
Follow our step-by-step instructions, and create a professional looking design with a beautiful spiral pattern. You can do this -- even if you are a beginner!
If you make a purchase through a link on my site, I may receive a small commission at no extra cost to you. I only recommend products that I believe to have good value (affiliate disclosure).
What You Need to Make Your Balloon Column
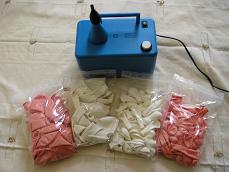
- 11" high quality latex balloons in two different colors (in our example we used 'Qualatex' pearl white and pearl peach),
- 5" high quality latex balloons in the same colors,
- your pre-prepared balloon column stand
- balloon sizer and
- an electrical inflator
Beginner's Tip: Don't want to make the balloon column stand yourself? You can buy ready made balloon column stand kits at Amazon. Choose one with a metal telescopic pillar, so that you can adjust the height to your needs.
For smaller, indoor columns (where there's not much danger of them toppling over), IKEA "Not" lamps are an affordable alternative.
For a balloon tower of 7'3" (2,2 m) height you'll need a stand of 6'2" (1,88 m), 17 x 11" balloons (9 white, 8 peach) and 52 x 5" balloons (26 white, 26 peach). Make sure you have some extra balloons in case any should burst.
Special Tip: If this tower will be the only air filled balloon decoration you'll ever make, consider renting an electric balloon pump instead of buying one. Check out specialized balloon suppliers in your area and ask whether they offer balloon inflators for rent.
Alternatively, gather friends and family together to help you blowing up the balloons or use a manual balloon pump.
Make a Balloon Column, Step 1
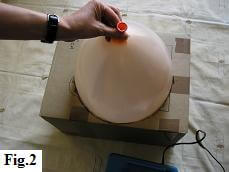
Take four 11" balloons, two of each color, and begin inflating them (fig. 1), using your balloon sizer to make sure that they are all a uniform size (fig. 2).
 |
 |
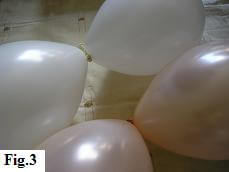
Tie them in clusters of two (fig. 3).
Note: The professional way is to tie both inflated balloons together with one single knot. To do this, you hold one inflated balloon in each hand, lay one neck over the other, pull the necks long, wrap them to the other side and then create the knot.
Sounds confusing? The short video below will demonstrate this technique much better than my description!

However, you may find that you lose air as you do this. Alternatively you could knot both balloons and then tie them together. Whatever method you use, stay consistent for all clusters.
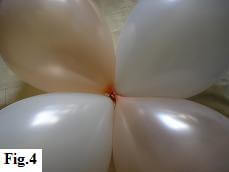
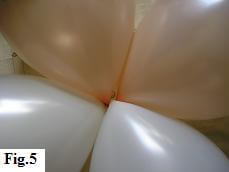
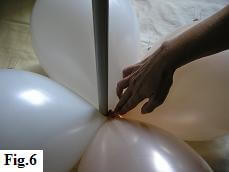
Now cross the two balloon pairs (fig. 4), and then twist them around once, so that you have both colors directly opposing each other (fig. 5). This first balloon quad can now be put in position at the base of your balloon stand (fig. 6).
Position the balloons so that the conduit pole is between two of them and simply push the cluster onto it, until it's in contact with the knots in the middle.
You'll find that it's such a snug fit that the balloons are self-securing. This technique will be used for all the balloon quads of the column.
To avoid confusion, once you begin constructing the spiral, always pass the conduit between the two white balloons of every new cluster that you attach.
 |
 |
 |
 |
Beginner's Tip: If you find it difficult to create and attach the balloon clusters to the column or arch frame, try using balloon rings (also called balloon clips or connectors).
They are easy to use and fit over a 1/2" pipe. You can get the balloon rings at Amazon.
Make Your Balloon Pillar, Step 2
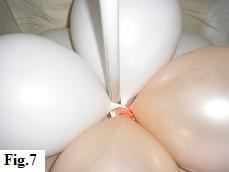
As in Step One, take four 11" balloons, two of each color, the only difference being that these four will be under inflated to 8". After inflating, tying and twisting, again you should have a cluster of two opposing colors.
Now put this quad in position, with the pvc pipe between the two white balloons (fig. 7).
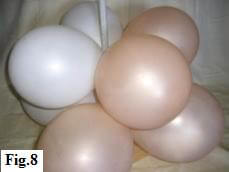
From this point you will be working from left to right, in other words, each new cluster will rotate 90 degrees (or one balloon) to the right (fig. 8).
 |
 |
Create Your Balloon Column, Step 3
Take four 5" balloons, two of each color, and inflate them fully, again checking their size with your balloon sizer.
Then tie them into duplets of two white and two peach balloons and twist them into a cluster of four, so that you have both colors directly opposite each other, as explained in step one.
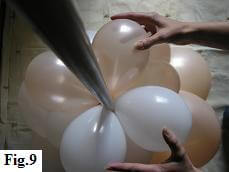
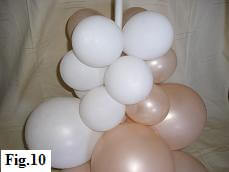
Now put this cluster into position on the column pole (fig. 9), remembering that you're moving one balloon to the right on each consecutive cluster to create the balloon pillar's spiral pattern (fig. 10).
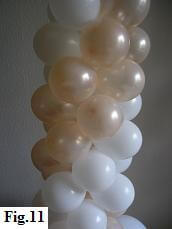
As you repeat the previous steps with your remaining 5" balloons the central spiral of the column will turn out beautifully (fig. 11).
Finish Your Balloon Tower, Step 4
Step four is basically the same as step two. You take four 11" balloons, two white and two peach ones, and under inflate them to 8".
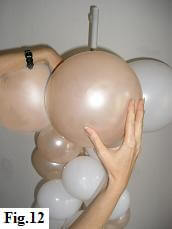
Tie them into two pairs of the same color and twist them into a cluster of four. Then put them into position (fig. 12).
The last stage now is the final cluster. As with the base of the column this consists of two peach and two white fully inflated 11" balloons.
Once twisted into your group of four, fully inflate another white 11" balloon and tie it directly to the center of the cluster.
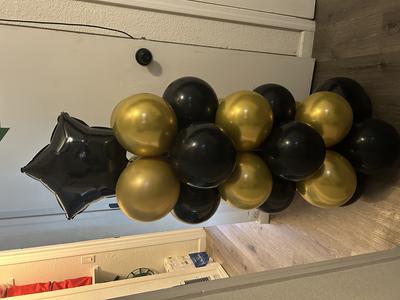
Alternatively, use a foil balloon as topper to match your party theme, whether it's a baby shower, graduation or birthday party.
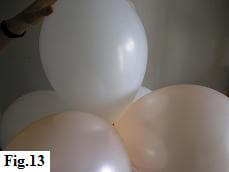
This acts as the 'crown' of your spiral column (fig. 13). Once this is in position, make a final visual check that all the balloons are positioned snuggly and are sitting in line.
If you want to make a balloon column to mirror your first one, then just follow all the previous instructions, but for one difference: you simply move one balloon to the left, instead of to the right, on every cluster.
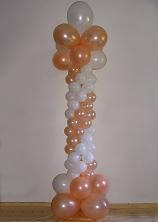 Your Finished Balloon Column, Version A
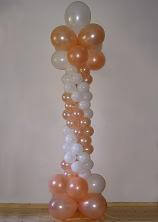 Your Finished Balloon Column, Version B
Frequently Asked Questions About DIY Balloon Columns
How many balloons do you need for a balloon column?
How many balloons you'll need for a balloon column depends on the column height, the balloon size and how many balloons per cluster you use.
For the ca. 7 ft high column shown in this tutorial, you'll need 17 x 11 inch balloons (one of them is for the crown at the top of the tower) and 52 x 5 inch balloons.
For a balloon pillar with clusters of four balloons, follow these guidelines to calculate the number of balloons you'll need:
- 5 inch balloons = 12 per foot
- 9 inch balloons = 8 per foot
- 11 inch balloons = 6 per foot
- 14 inch balloons = 4 per foot
- 16 inch balloons = 4 per foot
How do you make balloon pillars without a stand?
To make balloon pillars without a stand tie the balloon quads firmly together with curling ribbon, braided cord (also called VB cord or Dacron line) or natural twine.
Steps:
Attach a water or sand weight to the center of the first quad to make the column more stable. Take the ribbon or twine and tie the end round the necks of the first quad. Secure it with a double knot.
Place the second quad on top of the first one. Loop the ribbon or cord round at least two of the balloons in the first and second balloon quad.
Repeat the steps until all column clusters are tied together. Cut the ribbon and loop the remaining length tightly around the top balloon cluster.
How do you make a balloon stand?
Follow my step-by-step tutorial How to Make a Balloon Stand for Columns.
Can I make a balloon column the night before?
Yes, you can. Balloon columns are usually air-filled designs, so it's fine to make your column the night or day before the event.
For more tips, please see my answer to the question "how far in advance can I start my balloon tower."
How much do balloon columns cost?
If you make the balloon column yourself, your only expenses will be the materials and - of course - your time.
Tip: To save yourself unnecessary frustration, choose high quality balloon brands for your DIY column, especially if you want the balloons to last for more than a couple of hours!
You're not the DIY type and want to purchase a balloon column from a balloon professional? Prices vary depending on where you live and what size and type of column you want. For a classic balloon column with same sized balloons and a topper expect to pay US$75 or more.
A Roman style column like shown in this tutorial, prices are higher and start at about US$100. Organic columns, garland or half arches are usually more expensive as you need a lot more balloons per foot than for the traditional styles.
You're a balloon pro just starting out and wondering how much you should charge for your columns? Check out my short video tutorial How To Price Your Balloon Decor.
Enjoyed this balloon column tutorial? Then please share it or pin it for later.


Have your say about what you just read!
Leave me a comment in the box below. Don't see the comments box? Log into your Facebook account, give Facebook consent, then return to this page and refresh it.